Request to have the Parts Filter tool enabled in your Retailer Portal account.
Once the YMM – EasySearch app and Parts Filter tool are enabled, follow the steps below for the initial setup of the Hobby Parts Finder system. For more detailed information about the Parts Filter tool refer to Additional Details on the Parts Finder system
Enable the Parts Filter toolTo enable the Parts Filter tool contact support@stoysnet.com. Once the Parts Filter tool is enabled on your Retailer Portal account you will have access to the Parts Filter page under the Data Feeds dropdown.
Parts Finder Form setup
Step 1: Install the EasySearch – Year Make Model app on your Shopify site.
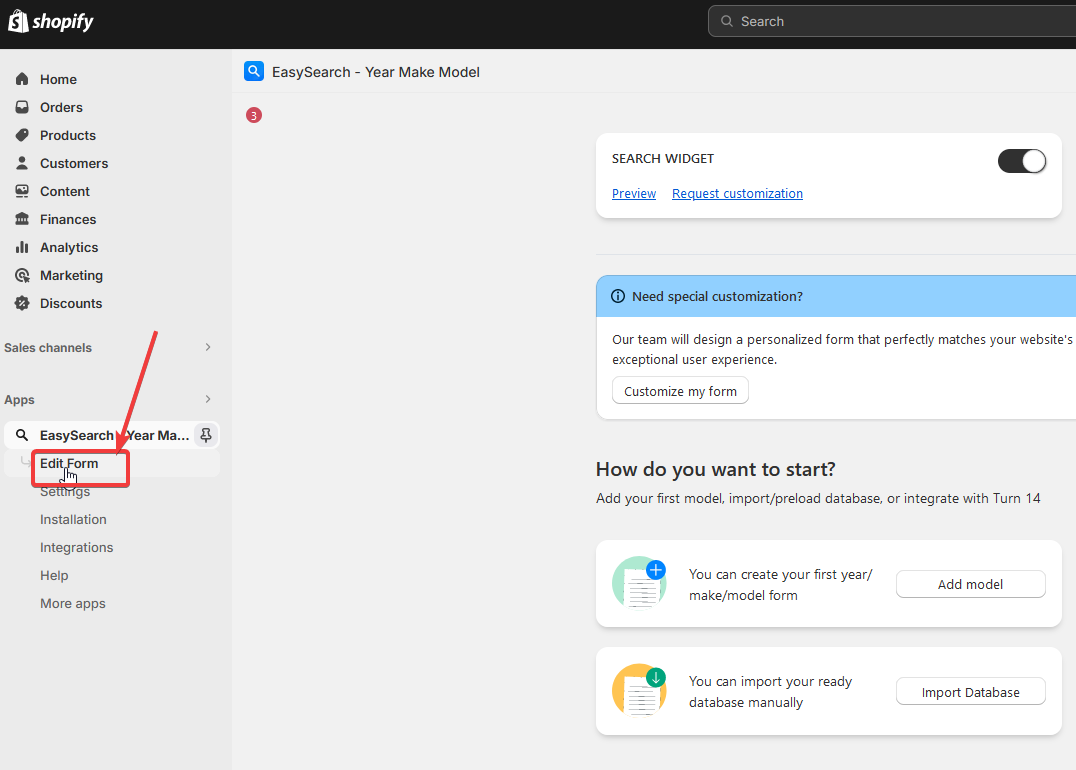
Step 2: Edit Form fields Go to the EasySearch – Year Make Model app on your site and click on the Edit Form link to load the Edit Form page.
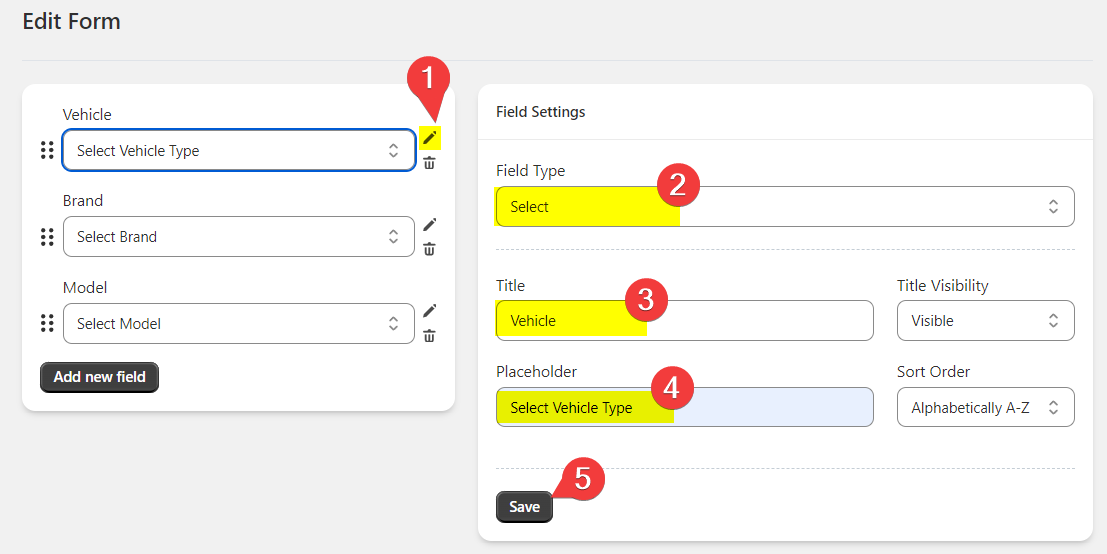
Once on the Edit Form page, change the names of the Form Fields from “Year-Make-Model” to “Vehicle-Brand-Model”.
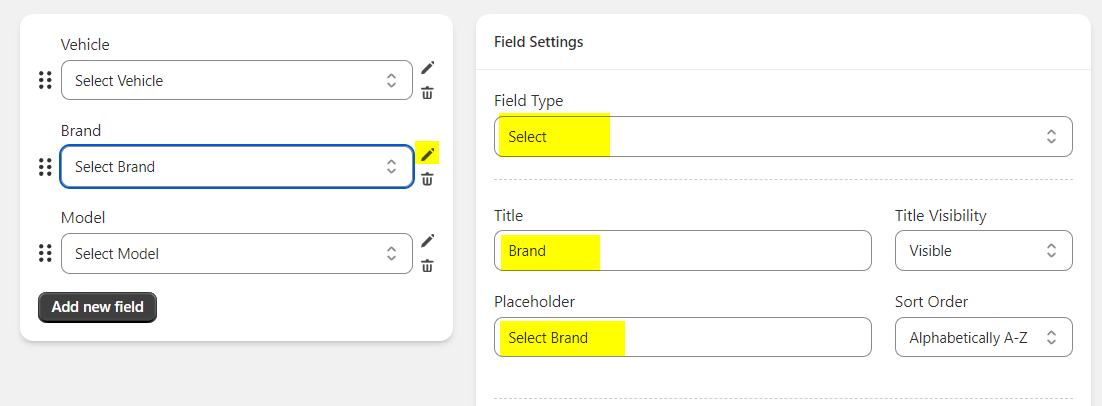
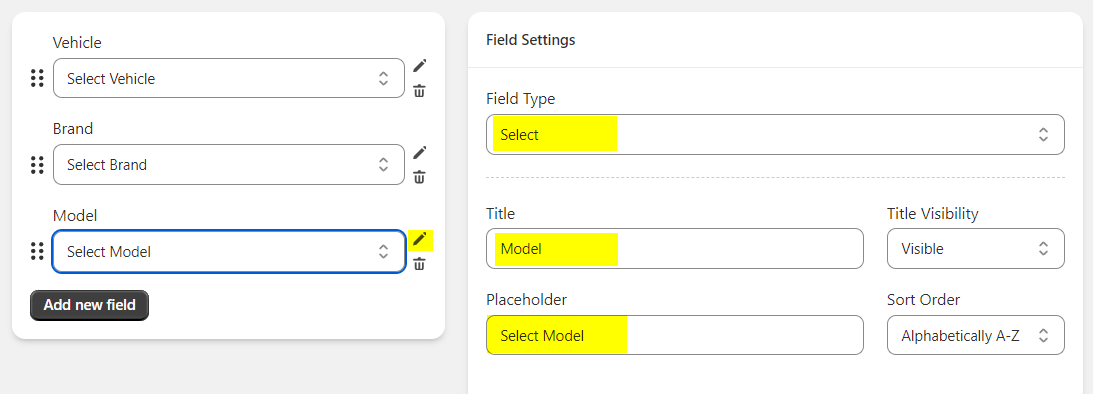
To change the field names you will need to click the pencil edit icon next to the form field in the left section. Then you can edit the field settings in the right section and click save to save the changes for that field. We recommend “Vehicle” for the 1st field, “Brand” for the 2nd field, and leave the 3rd field as “Model”.
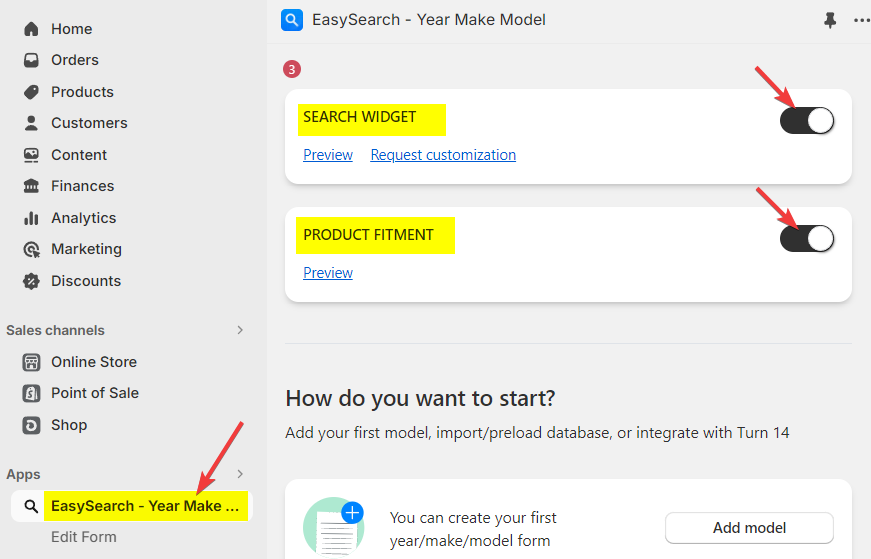
Step 3: Enable the Widgets Select the main EasySearch – Year Make Model app link, then slide the toggles to the right for Search Widget and Product Fitment (optional).
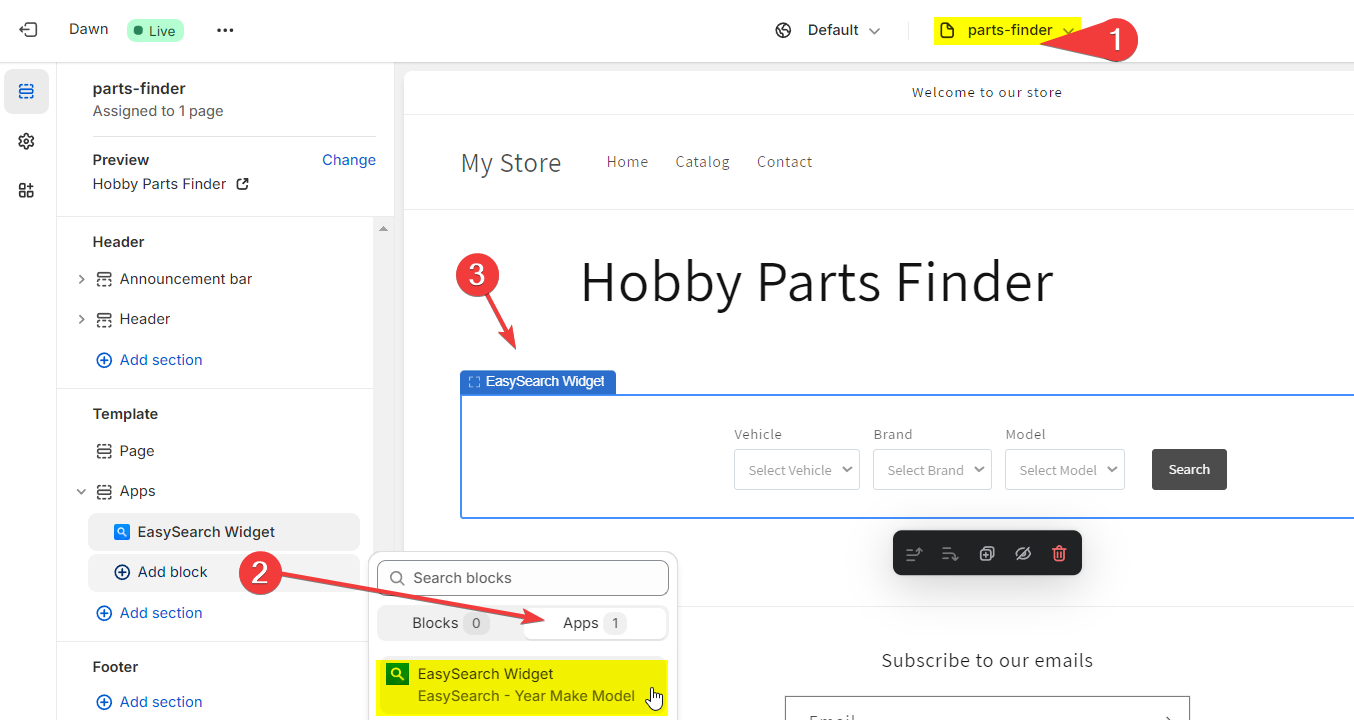
Step 4: Setup a Parts Finder page 4a: Create a custom page template called “parts-finder’, and add the EasySearch Widget to the page template.
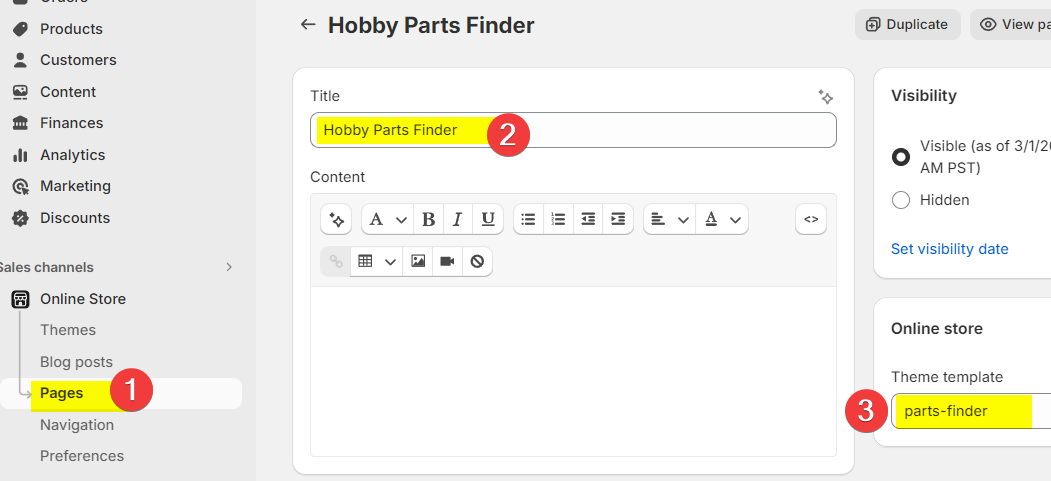
4b: Create a new page “Parts Finder” and assign it to the custom ‘parts-finder’ template.
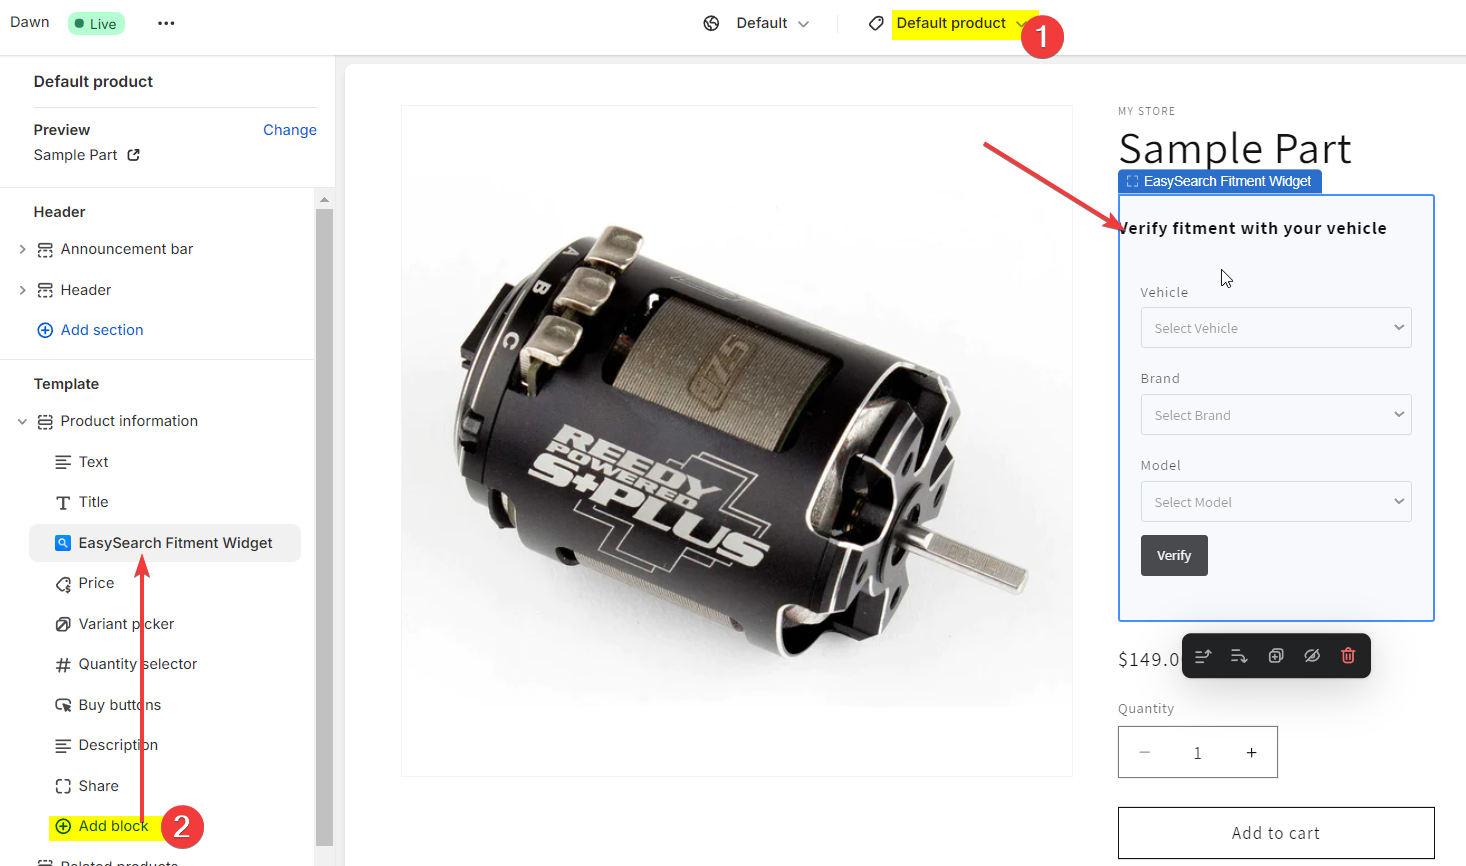
Step 5: Optional Fitment step Add the Fitment Widget to your product template.
Once the YMM EasySearch elements are setup, refer to the Working with the Parts Filter tool section below for adding your data to the system.
Working with the Parts Filter tool
For our purposes, the Part Finder System works by linking Models to Tags and then linking products to those Model Tags. Retail Portal will take care of the bulk of that work for you through the Parts Filter tool.
(!) Before pushing Model Tags to your site we recommend you backup your Shopify data. We are not responsible for any accidental results. During the data push, Retail Portal may need to push hundreds of tags to products that have broad model associations.
Need to Enable the Parts Filter tool?To enable the Parts Filter tool contact support@stoysnet.com. Once the Parts Filter tool is enabled on your Retailer Portal account you will have access to the Parts Filter page under the Data Feeds dropdown.
Pushing Model Tags & Uploading Parts Finder Data to your site
Data timingThe data used to populate your Parts Filter relationships requires overnight scripts to run for best results. For new installs of the Parts Filter tool, or in cases where new parts or parent model products have been added to Shopify, allow the Parts Filter tool overnight to compile up-to-date data.
Step 1: Login to Retailer Portal and go to the Data Feeds > Parts Filter Page.
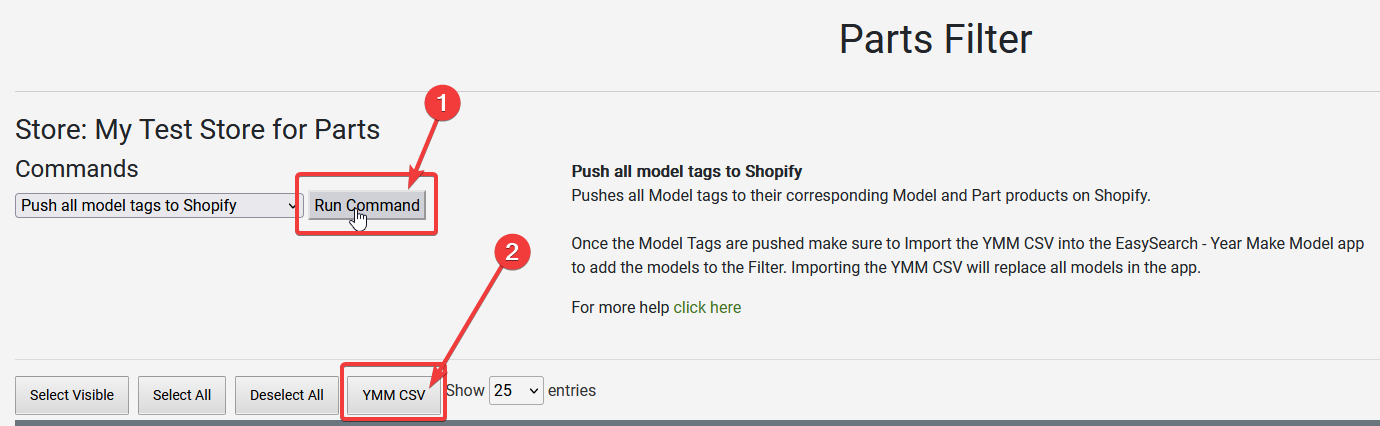
Step 2: On the Parts Filter page run the Push all model tags to Shopify command to push the model tags to their corresponding products on Shopify.
Step 3: Download YMM CSV. After running the push tags command, click the YMM CSV button to download the model CSV.
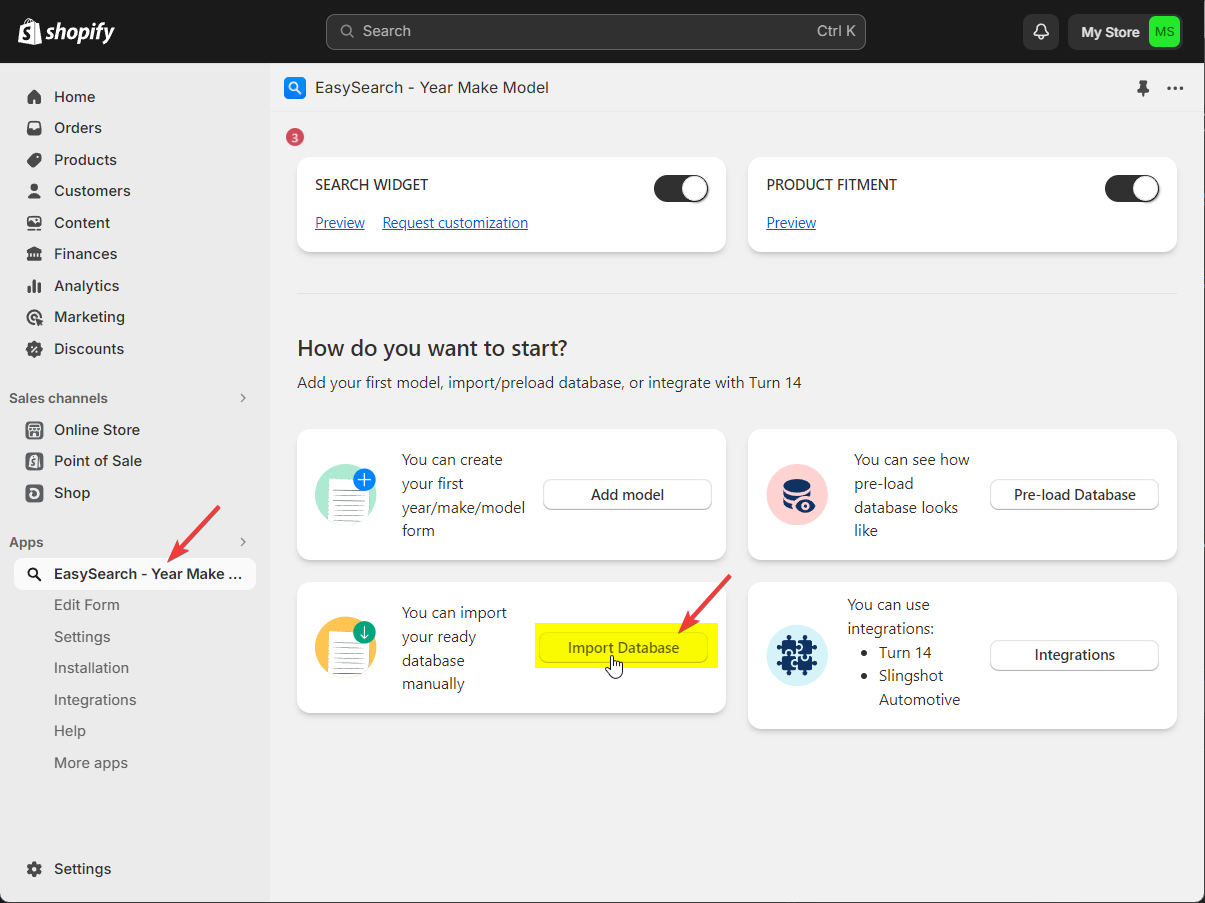
Step 4: Import the YMM CSV. In Shopify, Go to the EasySearch – Year Make Model app, and click Import Database.
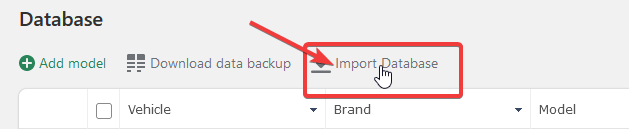
Note: If you have data in the table already, the Import Database link will be above:
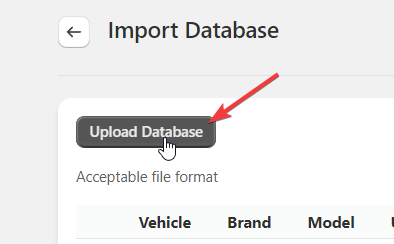
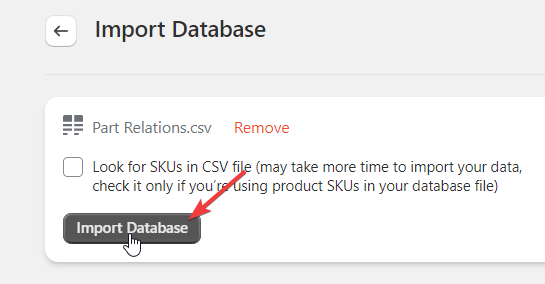
Step 4b: On the Import Database page, click the Upload Database button, and a file upload window will pop up. Select the YMM CSV file you downloaded earlier and upload it. By default, this file is named “Part Relations.csv” by Retail Portal.
Step 4c: A confirmation page will load next, click the Import Database button to import the models into the filter.
Your Hobby Parts Finder is now ready to use!
Once the parts data has finished importing, you are ready to test the results and take your website’s Parts Finder page live!